-
Umami Bomb Stuffed Mushrooms
Stuffed mushrooms are the cutest appetizer out there.
So round, so poppable, and so delicious. I absolutely love stuffed mushrooms. They’re easy to make (and make ahead if you need to) and they’re always a hit.
I love stuffed mushrooms and how infinitely customizable they are. They’re kind of like the vegetarian version of a deviled egg! I’m all about tiny bite-sized stuffed things and stuffed mushrooms fit the bill perfectly. These cheesy miso stuffed mushrooms are particularly good because they’re triple umami: mushrooms, miso, and parmesan cheese! They’re so full of flavor and satisfying.
How to Make Stuffed Mushrooms
- Prep the Mushrooms: Wash your mushrooms, trim the stems, and gently break the stems from the caps. Place the caps on a parchment paper-lined baking sheet.
- Sauté the Stems: Mince the stems and sauté them in butter until golden, then let cool.
- Mix the Filling: While the stems are cooling, mix together cream cheese, mayo, and a bit of white miso. Stir in the sautéed stems, then stuff the mushrooms, topping them with parmesan.
- Bake: Bake until golden and piping hot, then enjoy!
Ingredients
- 16 large mushrooms (white or brown)
- 2 tbsp butter
- 4 oz cream cheese
- 1/4 cup mayo (kewpie mayo preferred)
- 1 tbsp white miso
- 1/4 cup Parmigiano Reggiano cheese, finely grated
- Parsley, finely chopped, to finish

How to make Umami Bomb Stuffed Mushrooms
- Heat the Oven: Preheat to 400°F. Line a baking sheet with parchment paper.
- Prepare the Mushrooms: Trim the bottom of the stems, then gently break them off. Place the mushroom caps on the prepared baking sheet.
- Mince and Sauté: Finely mince the mushroom stems. In a medium skillet over medium heat, melt the butter and sauté the mushroom stems until soft and golden. Remove from heat and let cool slightly.
- Make the Filling: In a bowl, mix together the cream cheese, mayo, and white miso until smooth. Stir in the sautéed mushroom stems. Taste and season with freshly ground pepper.
- Stuff the Mushrooms: Scoop the filling into the mushroom caps and top with grated parmesan.
- Bake: Bake for 20 minutes or until the cheese melts and the mushrooms are piping hot. Finish with parsley, let cool slightly, and enjoy!

Helpful Hints
- Washing Mushrooms: Wash mushrooms right before use. Place whole mushrooms in a sieve and spray off any dirt with cold water. Spin or pat dry with paper towels. Use immediately.
- Choosing Mushrooms: Select mushrooms that are about the same size so they cook evenly. They should be whole, intact, and feel springy and light.
-
Heavenly Cheesy Scalloped Potatoes
There’s something magical about a dish of scalloped potatoes, especially when it’s as rich and cheesy as this one. Imagine tender layers of thinly sliced potatoes, bathed in a luxurious, velvety cheese sauce, and baked to golden perfection. This side dish is so delightful, you might just want to make it the main course. Whether you’re serving it alongside a holiday roast or simply indulging on a cozy evening, these Heavenly Cheesy Scalloped Potatoes are sure to satisfy.
Ingredients
- 2 tbsp butter, divided, room temp
- 2 lbs potatoes (Yukon Gold preferred, about 4)
- 1 cup heavy cream
- 1 cup whole milk
- 3 cloves garlic, crushed
- 1/2 tbsp fresh thyme
- 4 oz Gruyère cheese, coarsely grated (about 1.5 heaping cups)
- Salt and freshly ground pepper

How to make Cheesy Scalloped Potatoes
- Preheat your oven to 375°F. Generously butter a small 2-quart baking dish.
- Peel the potatoes and slice them into 1/8 inch thick rounds.
- Place the potato slices in a large pot along with the cream, milk, garlic, and thyme. Season with salt and freshly ground pepper.
- Bring the mixture to a boil over high heat, then reduce to medium and simmer for 1 minute. Remove from the heat and let stand for 10 minutes.
- Spoon 1/3 of the potato mixture into the prepared baking dish and sprinkle with 1/2 of the cheese. Add another 1/3 of the potatoes and top with the remaining cheese. Dot with butter.
- Finish with the last layer of potatoes and loosely cover with foil. Bake until the potatoes are tender and cooked through, about 35-40 minutes.
- Remove the foil and broil until the top is bubbly and golden brown, 3-5 minutes.
- Let rest for 15-30 minutes before serving to allow the sauce to thicken and absorb into the potatoes.

Helpful Hints
- For an extra cheesy twist, mix in a bit of sharp cheddar with the Gruyère.
- If you prefer a lighter version, substitute half of the heavy cream with more milk.
- Letting the dish rest after baking is crucial for the perfect texture. Be patient!
-
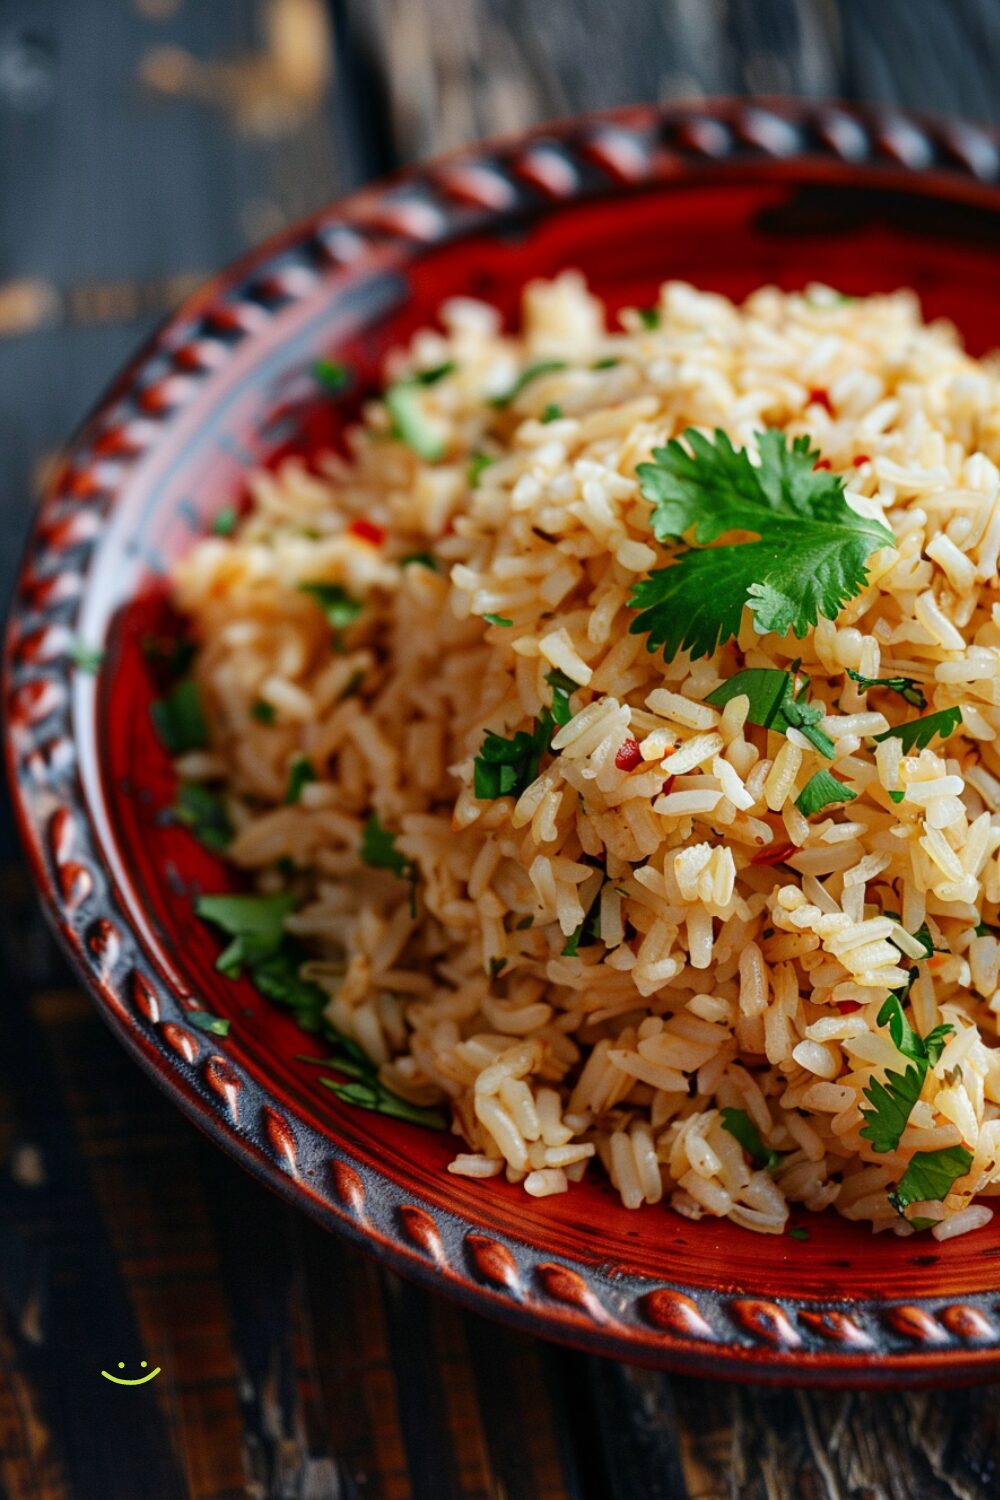
Fiesta Flavors: Mexican Rice Done Right
Mexican rice is a cornerstone of Mexican cuisine and one of the best executions of rice on the planet. It’s right up there with Hainanese chicken rice, fried rice, and paella. Who doesn’t love Mexican rice? But did you know it’s super easy to make at home and way healthier than buying those bags of premade rice that account for 80% of your daily sodium? If you ever wanted to amp up taco night, Mexican rice, refried beans, and homemade salsa are the low hanging fruit. Let’s dive into the fiesta of flavors with this simple yet delicious Mexican rice recipe!
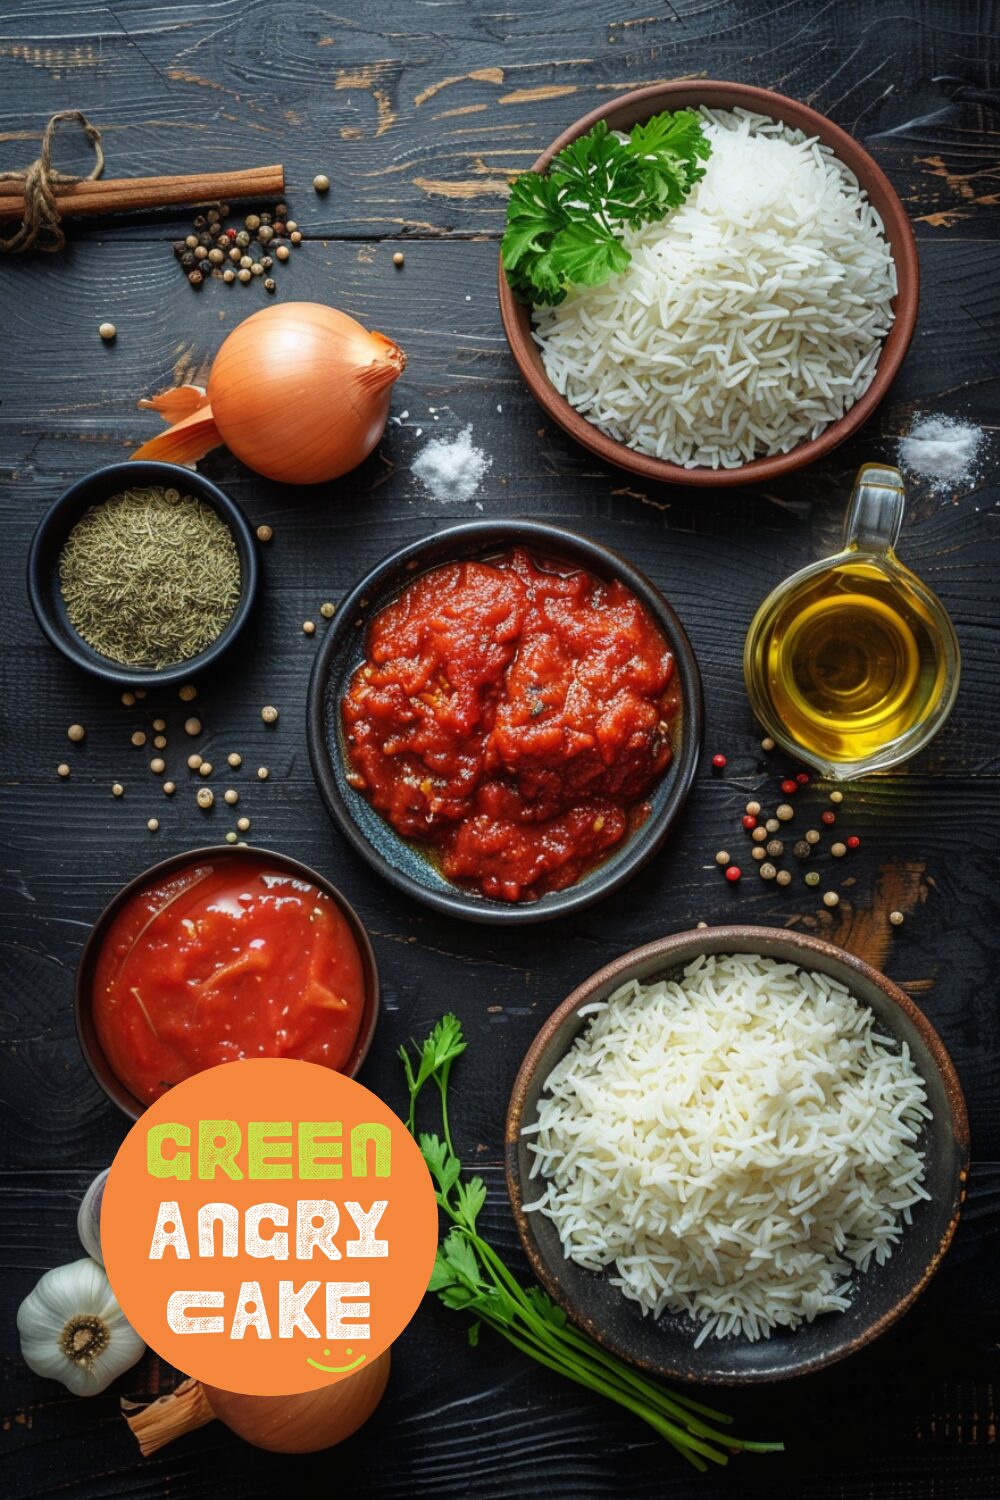
Ingredients
- 1 tbsp oil
- 1 clove garlic, minced
- 1/2 onion, roughly chopped
- 1 cup long grain rice
- 1 tsp cumin
- 1 tsp Mexican oregano
- 1/2 cup tomato sauce (or up to 1 cup)
- 1.25 cup water
Special Equipment
- Nonstick pan with a lid
How to make Mexican Rice
- Heat 1 tablespoon of oil over medium-high heat and add onions. Fry until onions are just translucent, about 3 minutes.
- Add the rice, garlic, and cumin. Continue frying until rice is golden brown and nutty, about 2-3 minutes.
- Add tomato sauce and oregano. Stir until rice is evenly coated with tomato sauce.
- Add water and bring to a rolling boil over high heat.
- When the water has reached a boil, immediately cover with a lid and reduce heat to the lowest setting. Set a timer for 20 minutes and don’t disturb or peek under the lid for any reason.
- When the 20 minutes are up, remove from heat, continuing not to touch the lid, and let steam for another 10 minutes. After 10 minutes, fluff and serve.

Helpful Hints
- Frying the rice until it’s nutty and golden is crucial for achieving that restaurant-quality texture.
- Use Mexican oregano for an authentic taste, but if unavailable, regular oregano will do.
- Adjust the amount of tomato sauce according to your preference for a richer or lighter tomato flavor.
-
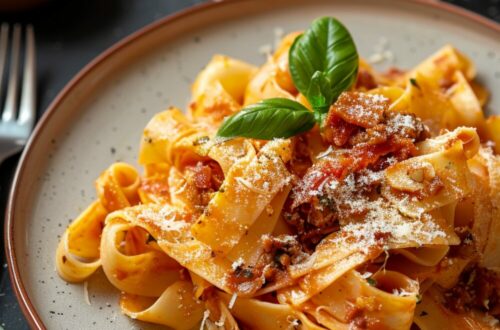
Quick and Comforting: Prosciutto Ragu with Pappardelle
When the day has been long and you need a quick yet comforting dinner, this pappardelle with prosciutto ragu is the perfect solution. The rich flavors of prosciutto and pork meld together in a sauce that’s both simple and satisfying. Paired with homemade pappardelle, this dish transforms your weeknight dinner into a culinary escape. The fresh, wide noodles perfectly capture the robust, savory sauce, offering a delightful contrast to store-bought pasta.
Inspired by a delightful visit to a quaint pasta restaurant in NYC, this ragu combines the essence of Emilia Romagna cuisine with a touch of home comfort. The simplicity of this dish lies in its few ingredients, yet it delivers a depth of flavor that feels both luxurious and familiar. So, roll up your sleeves, make some fresh pasta, and let the aromas of this quick and comforting meal fill your kitchen.
Ingredients
- 1/4 cup chopped prosciutto (feel free to use pancetta or bacon)
- 1 large egg
- 1/4 cup freshly grated Parmigiano-Reggiano cheese
- Freshly ground pepper
- 1/2 tablespoon chopped flat leaf parsley, or to taste
- 4 ounces of your favorite long pasta

How to make Prosciutto Ragu with Pappardelle
- Start by boiling a pot of water and then cooking your pasta according to the package. Time it so that everything else is prepared by the time the pasta is cooked.
- Fry the prosciutto in a small sauté pan over medium heat until it starts to crisp at the edges.
- Break the egg into a bowl big enough to toss the pasta in. Beat it lightly with a fork, then add the cheese, a liberal grinding of pepper, and the chopped parsley. Mix thoroughly.
- Add cooked, drained spaghetti to the bowl, and toss rapidly, coating the strands well.
- Add the entire contents of the prosciutto pan into the bowl, toss thoroughly again, and enjoy at once.

Helpful Hints
- Ensure your pasta water is well salted; it should taste like the sea.
- If you don’t have prosciutto, pancetta or bacon make excellent substitutes.
- Freshly grated Parmigiano-Reggiano melts better and has a superior flavor to pre-grated cheese.
- Let the pasta rest for a few minutes after tossing to allow the flavors to meld.
-
One-Pot Magic: Creamy Chicken Alfredo
When the chill sets in, nothing warms the soul like a bowl of creamy chicken Alfredo. This dish is the epitome of comfort food, offering spoonfuls of cheesy, creamy, carb-filled goodness. Imagine super juicy pieces of chicken, perfectly al dente noodles, all smothered in a rich, savory, buttery Alfredo sauce. This is weeknight dining at its finest, and it all comes together in the magic of one pot.
What is Alfredo Sauce?
Classic Alfredo sauce is a simple yet luxurious combination of butter, cheese, and pasta water. This trifecta creates a smooth, rich sauce that perfectly coats the pasta. But here, we’re giving it a modern twist. Think Olive Garden’s creamy, garlicky white sauce, but even better. It’s not traditional, but it’s incredibly satisfying and ideal for busy weeknights.
How to Make Chicken Alfredo in the Instant Pot
You might be surprised to learn that you can cook pasta right in your Instant Pot. It’s a game-changer for one-pot meals, where the pasta absorbs all the delicious flavors while releasing starches that thicken the sauce beautifully.
- Prepare the Ingredients: Add chopped chicken, penne (or your pasta of choice), chicken stock, and garlic powder to the Instant Pot. Stir well to combine, then cook on high pressure for 5 minutes.
- Mix the Sauce: While the Instant Pot works its magic, whisk together some cream with a tiny bit of cornstarch in a small bowl. Grate the Parmesan cheese finely.
- Combine and Finish: Once the timer beeps, quick release the pressure and carefully open the lid. Turn the pot to sauté medium, stir in the cream-cornstarch mix and butter. Simmer until slightly thickened, then add the Parmesan until it melts, coating every noodle in creamy perfection. Taste, season, and enjoy!

Creamy Chicken Alfredo Ingredients
This recipe shines in its simplicity, requiring just nine ingredients:
- Chicken: Juicy thighs are ideal, but chicken breast works too.
- Penne: Short pasta varieties like penne are perfect for this dish. You can also use fettuccine, broken in half.
- Chicken Stock: Enhances the overall flavor.
- Garlic Powder: Adds a subtle depth.
- Cream and Cornstarch: These combine to create a glossy, creamy sauce.
- Butter: For richness.
- Parmesan: Freshly grated for the best melt and flavor.

Helpful Hints
- Freshly Grate Your Parmesan: It melts better and tastes superior to pre-grated options.
- Juicy Chicken: Thighs are less likely to dry out compared to breasts.
- Perfect Pasta: Ensure your pasta is cooked al dente for the best texture.
-
Flavor-Packed Instant Pot Pho
Pho might just be the world’s most beloved soup, and for good reason. This Vietnamese classic is a symphony of flavors, combining a deeply spiced broth with tender meats and fresh herbs. With this recipe, we’re bringing you a quick and delicious version made in the Instant Pot, so you can enjoy a bowl of pho without waiting for hours.
Growing up, pho was a staple in my household. The rich, aromatic broth and the tender slices of meat always brought comfort. This recipe captures that same essence but is adapted for the modern kitchen. It’s a breeze to make, yet it retains all the authentic flavors that make pho so special.
What sets this pho apart is the deeply spiced and aromatic broth, achieved by charring the aromatics and adding a blend of spices that infuse the soup with layers of flavor. And the best part? It’s all done in the Instant Pot, making it a quick yet satisfying meal. Whether you’re a pho aficionado or a newbie, this recipe is sure to become a favorite in your household.
Ingredients
- 1 large onion, charred
- 2 inches ginger, charred
- 2 lbs beef bones
- 1 lb beef finger meat
- 1 cinnamon stick
- 2 star anise
- 1 tablespoon coriander seeds
- 1 tablespoon fennel seeds
- 2 cloves
- 5-6 dried Chinese chilis
- 2 tablespoons fish sauce
- 1 piece rock sugar
- 4 quarts water
- Fresh rice noodles
- Thinly sliced sirloin
- Thai basil
- Bean sprouts
- Lime wedges
- Fresh cilantro
- Sliced green onions

Pho Variations
- Chicken Pho: Swap out the beef for chicken bones and chicken meat. Adjust cooking time to 20 minutes in the Instant Pot.
- Vegetarian Pho: Use vegetable broth and omit the meat. Add extra vegetables like mushrooms and tofu.
- Spicy Pho: Add more dried chilis and a spoonful of chili paste to the broth for an extra kick.
- Seafood Pho: Use a seafood broth base and add shrimp, fish balls, and calamari rings. Cook the broth for 15 minutes.
How to Make The Best Instant Pot Pho
- Char the Aromatics: Start by charring your onions and ginger. You can do this with a blowtorch, on a gas stove, or under the broiler. This step is crucial for deep, smoky flavors.
- Load the Instant Pot: Place the charred aromatics, beef bones, finger meat, cinnamon stick, star anise, and other spices into the Instant Pot. Add water to cover everything.
- Cook: Set the Instant Pot to high pressure for 35 minutes. Once done, perform a quick release.
- Season the Broth: Add rock sugar and fish sauce (or salt) to taste. The broth should be slightly over-seasoned since it will balance out when served with noodles and herbs.
- Prepare the Noodles and Toppings: While the broth is cooking, prepare the rice noodles according to package instructions. Slice the sirloin thinly and prepare any additional toppings like Thai basil, bean sprouts, and lime wedges.
- Assemble Your Bowl: Place the cooked noodles and raw sirloin in a bowl. Pour the hot broth over to cook the meat. Top with onions, cilantro, and other garnishes.
- Enjoy: Serve immediately with additional garnishes and sauces on the side.

Helpful Hints
- Char the Aromatics: Don’t skip the step of charring the onions, ginger, and spices. It’s essential for that deep, authentic pho flavor.
- Use Fresh Herbs: Fresh Thai basil, cilantro, and bean sprouts add brightness and crunch to your bowl. Always have them on hand when serving pho.
- Control the Fat: If you prefer a less fatty broth, let the soup cool and skim off the solidified fat before reheating and serving.
-
Rich and Creamy Porchetta Carbonara
When you find yourself with an abundance of porchetta, creativity in the kitchen becomes a necessity. Porchetta sandwiches are delightful, porchetta tacos are a treat, but porchetta carbonara? That might just be the pinnacle. Picture this: tender, crispy bits of porchetta enveloped in a silky egg and cheese sauce, clinging to every strand of pasta. It’s like having breakfast for dinner but elevated to gourmet status. Carbonara has always been a favorite, and this version, with its rich and creamy texture, might just surpass the traditional.
Ingredients
- 1/4 cup chopped porchetta (pancetta or bacon can be substituted)
- 1 large egg
- 1/4 cup freshly grated Parmigiano-Reggiano cheese
- Freshly ground pepper
- 1/2 tablespoon chopped flat-leaf parsley, or to taste
- 4 ounces of your favorite long pasta

How to make Porchetta Carbonara
- Prepare the Pasta: Start by boiling a pot of water and cook your pasta according to the package instructions. Time it so that everything else is prepared by the time the pasta is cooked.
- Crisp the Porchetta: In a small sauté pan over medium heat, fry the chopped porchetta until it starts to crisp at the edges.
- Make the Sauce: Break the egg into a large bowl (big enough to toss the pasta in). Beat it lightly with a fork, then add the grated cheese, a generous grinding of pepper, and the chopped parsley. Mix thoroughly.
- Combine: Add the cooked, drained pasta to the bowl with the egg mixture. Toss rapidly, ensuring the pasta is well coated with the sauce. Add the crispy porchetta, including any rendered fat from the pan, and toss thoroughly again.
- Serve: Enjoy immediately, garnished with additional parsley if desired.

Helpful Hints
- Timing is Key: Start boiling your pasta first, then work on crisping the porchetta to ensure everything is ready at the same time.
- Freshly Ground Pepper: Freshly ground pepper makes a big difference in flavor. Grind it right before adding to the dish for the best taste.
- Toss Rapidly: When combining the pasta with the egg mixture, toss quickly to ensure the heat of the pasta cooks the egg and melts the cheese without scrambling the egg.
- Customize Your Pork: If you don’t have porchetta, pancetta or bacon are great substitutes.
- Quality Cheese: Use freshly grated Parmigiano-Reggiano for the best flavor and texture.
-
The Legendary Juicy Lucy: Cheeseburger Perfection
It’s burger season, and there’s a burger that stands above the rest – the Juicy Lucy. Imagine biting into a burger and discovering a molten core of cheese hidden within the patty. It’s not just a cheeseburger; it’s an experience. The Juicy Lucy, a creation born in Minneapolis, offers a twist on the classic by embedding the cheese right inside the patty. This technique ensures every bite is juicy and filled with cheesy goodness. It’s straightforward and satisfying – just like good food should be.
Ingredients
- 1/4 lb ground beef chuck, preferred
- 1/4 cup shredded cheddar cheese, preferred
- Salt and freshly ground pepper
- 1 burger bun (see notes)
- 1 leaf green leaf lettuce, torn
- 1 slice tomato
- Pickles, if desired
- Condiments, if desired

How to make a The Legendary Juicy Lucy
- Divide the beef into roughly 1/3 and 2/3 portions. Shape the 2/3 portion into a burger shape with an indent in the middle. Make the burger slightly larger than your bun as it will shrink while cooking. Put the cheese in the center of the larger patty. Top with the remaining beef and shape compactly into a burger patty. Season both sides with salt and pepper.
- Heat a cast iron pan over medium-high. Butter and toast your buns, then set aside.
- Add the burger to the pan and fry for 3-4 minutes on each side, until charred and a crust starts to form.
- Spread ketchup, mayo, and mustard to taste on the bottom bun. Top with the burger, lettuce, tomato, and the top bun. Enjoy immediately!

Helpful tips:
Burger buns are one of the most important and overlooked components of any burger. I prefer Martin’s potato rolls, every time.
-
Spicy Malaysian Coconut Chicken Curry Recipe
Nothing says comfort food quite like a bowl of spicy, coconutty Malaysian chicken curry. Imagine tender, juicy chicken pieces, perfectly cooked potatoes, and a rich, aromatic sauce that clings to every grain of rice. This curry isn’t just food; it’s an experience that brings warmth to your soul and a smile to your face. Growing up, chicken curry was a staple in our household, and this Malaysian twist is my homage to those cherished memories.
This curry is a beautiful fusion of Malaysian, Singaporean, and Indonesian influences, creating a flavor bomb that’s hard to resist. The secret? A slow simmer with a hand-pounded paste of lemongrass, garlic, shallots, and Thai chilis, all thickened with creamy coconut milk and seasoned with spices like star anise and cinnamon. It’s the kind of dish that makes your kitchen smell amazing and brings everyone to the table.
How to Make Spicy Malaysian Coconut Chicken Curry
- Make the curry paste. Crush lemongrass, garlic, shallots, ginger, and Thai chilis together with a mortar and pestle or use a food processor. Stir in the curry powder, turmeric, chili flakes, and a bit of oil.
- Marinate. Let the chicken absorb ALL the flavors. Longer is better, but at least 30 minutes.
- Sear. Give the chicken skin a nice golden sear. This also fries the curry paste a bit to bring out the flavors.
- Simmer. Simmer everything together until the chicken is juicy and cooked through and the potatoes are nice and tender, about 1 hour.

Ingredients:
- 2 lbs chicken, cut into pieces
- 2 potatoes, peeled and cubed
- 1 can coconut milk
- 1 cup chicken stock
- 2 sticks lemongrass, finely chopped
- 4 cloves garlic
- 4 shallots
- 1-inch piece ginger
- 2 Thai chilis
- 2 tbsp curry powder
- 1 tsp turmeric
- 1 tsp chili flakes
- 2 tbsp oil
- 1 cinnamon stick
- 2 star anise
- 2 tbsp fish sauce
- Lime leaves (optional)
- Rice, for serving

Helpful Hints:
- For extra flavor, let the curry sit overnight in the fridge. It tastes even better the next day!
- Adjust the spiciness by adding more or fewer Thai chilis and chili flakes.
- Serve with fluffy white rice or roti prata for an authentic experience.
-
Ham and Egg Brunch Pizza with Mini Sunny Side Up Eggs
Who said pizza isn’t for breakfast? Get ready to dive into this brunch-y pizza, topped with melty mozzarella, savory ham, and adorable mini sunny side up quail eggs.
There’s something about mini foods that just makes them irresistible. Maybe it’s their cute size or the way they seem to pack in even more flavor. Whatever it is, quail eggs have won my heart. They’re the perfect mini version of regular eggs, complete with rich yolks and speckled shells.
This breakfast pizza is a delight, combining all the best breakfast elements into one dish. I had a slight mishap the first time I made it – I forgot to oil my pizza pan, and the pizza stuck to it like glue. But no worries, I had extra dough in the fridge, so a quick redo saved the day. Pro tip: always oil your pan!
Ingredients:
- Oil for the pan
- 12 quail eggs
- 1 ball no-knead pizza dough or pizza dough of choice
- 1/3 – 1/2 cup pizza sauce, depending on how saucy you like your pizza
- 1 – 1.5 cups shredded mozzarella
- 6-8 slices thin deli ham
- Fresh basil, if desired
- Red pepper flakes, if desired

How to Make It:
- Preheat Oven: Arrange a rack in the middle of the oven and preheat to its hottest setting, 500°–550°.
- Cook Quail Eggs: In a non-stick pan, fry quail eggs sunny side up in a touch of oil, 1-2 minutes on medium heat. Set aside.
- Prepare Dough: Lightly oil a cast iron pan and dust lightly with cornmeal, if desired. Or, lightly oil and dust a baking sheet. Shape dough into a circle, pushing gently until fairly thin.
- Assemble Pizza: Spread on the sauce almost to the edges. Top generously with the shredded mozzarella and a sprinkling of red pepper flakes. Top with ham.
- Bake: Bake for 10-15 minutes, or until the crust is puffy, crisp, and slightly blistered.
- Top and Serve: Remove and top with the quail eggs and freshly torn basil. Enjoy immediately with extra red pepper flakes, if desired.
Helpful Hints:
- Pre-cook the Quail Eggs: Cooking the quail eggs beforehand ensures they are perfectly cooked and ready to top the pizza.
- Cornmeal for Texture: Dusting the pan with cornmeal adds a delightful crunch to the pizza crust.
- Fresh Basil: Add fresh basil after baking for a burst of flavor and color.
- Crispy Ham: Thinly sliced deli ham crisps up nicely, adding a delicious savory note to the pizza.

