-
Ham and Egg Brunch Pizza with Mini Sunny Side Up Eggs
Who said pizza isn’t for breakfast? Get ready to dive into this brunch-y pizza, topped with melty mozzarella, savory ham, and adorable mini sunny side up quail eggs.
There’s something about mini foods that just makes them irresistible. Maybe it’s their cute size or the way they seem to pack in even more flavor. Whatever it is, quail eggs have won my heart. They’re the perfect mini version of regular eggs, complete with rich yolks and speckled shells.
This breakfast pizza is a delight, combining all the best breakfast elements into one dish. I had a slight mishap the first time I made it – I forgot to oil my pizza pan, and the pizza stuck to it like glue. But no worries, I had extra dough in the fridge, so a quick redo saved the day. Pro tip: always oil your pan!
Ingredients:
- Oil for the pan
- 12 quail eggs
- 1 ball no-knead pizza dough or pizza dough of choice
- 1/3 – 1/2 cup pizza sauce, depending on how saucy you like your pizza
- 1 – 1.5 cups shredded mozzarella
- 6-8 slices thin deli ham
- Fresh basil, if desired
- Red pepper flakes, if desired

How to Make It:
- Preheat Oven: Arrange a rack in the middle of the oven and preheat to its hottest setting, 500°–550°.
- Cook Quail Eggs: In a non-stick pan, fry quail eggs sunny side up in a touch of oil, 1-2 minutes on medium heat. Set aside.
- Prepare Dough: Lightly oil a cast iron pan and dust lightly with cornmeal, if desired. Or, lightly oil and dust a baking sheet. Shape dough into a circle, pushing gently until fairly thin.
- Assemble Pizza: Spread on the sauce almost to the edges. Top generously with the shredded mozzarella and a sprinkling of red pepper flakes. Top with ham.
- Bake: Bake for 10-15 minutes, or until the crust is puffy, crisp, and slightly blistered.
- Top and Serve: Remove and top with the quail eggs and freshly torn basil. Enjoy immediately with extra red pepper flakes, if desired.
Helpful Hints:
- Pre-cook the Quail Eggs: Cooking the quail eggs beforehand ensures they are perfectly cooked and ready to top the pizza.
- Cornmeal for Texture: Dusting the pan with cornmeal adds a delightful crunch to the pizza crust.
- Fresh Basil: Add fresh basil after baking for a burst of flavor and color.
- Crispy Ham: Thinly sliced deli ham crisps up nicely, adding a delicious savory note to the pizza.
-
Cheesy Heaven: Cheeseburger and Egg Grilled Cheese Recipe
The ultimate cheesy brunch: buttery toasted country slices sandwiching two all-beef patties, an over-easy egg, and ALL the cheese! April is Grilled Cheese Month (who invents these things?!) and even though I’m not really about random food days/months, I’m all about grilled cheese, so bring it on! We couldn’t let the month pass by without eating grilled cheese, so we celebrated with this big breakfast monster: crusty country bread, two beef patties, an over-easy egg, and so much cheese.
This guy is essentially a patty melt: a burger on bread instead of in a bun. Patty melts are classic diner food and I’m sad to say that I’ve never actually had one in a diner. I love diners and diner food in general, so this is my kind of grilled cheese.
Ingredients:
- 6 oz lean ground beef
- Salt and freshly ground pepper
- Oil for the pan
- 2 slices of your favorite bread
- 1-2 tablespoons butter
- 1 over-easy egg
- 1 cup shredded cheese of choice

How to Make It:
- Divide the ground beef into two and pat into very thin patties, the shape of your bread. Season both sides with salt and pepper. Heat a heavy-bottomed pan over high heat and add a bit of oil. Cook the patties, pressing down to get a good sear, until very brown, about 1-2 minutes. Flip and cook the other side. Remove from the pan.
- Build your sandwich, buttered bread facing outwards: bread, cheese, burger, cheese, burger, cheese, egg, cheese, bread.
- Grill on medium-low until golden brown and toasty and cheese is melted, flipping once. Enjoy!

Helpful Hints:
- For a perfectly over-easy egg, cook until the whites are set but the yolk is still runny. It adds a delicious creaminess to the sandwich.
- If you like your burger patties well-done, cook them for an additional minute on each side.
- Experiment with different cheeses for a unique flavor profile. Cheddar, mozzarella, or pepper jack all work wonderfully.
-
Bacon and Egg Breakfast Ramen
Ramen noodles might not be what you think of when you think of brunch, but to me, noodles are the perfect food, especially when paired with eggs. Eggs are my spirit food (noodles are too!). If there are eggs around, you best believe I’m going to be there. Some of the best eggs I’ve had have been in Japan and it’s no wonder because they take their eggs seriously there. The raw eggs in Japan are gorgeous: the yolks are a deep golden yellow and the whites are firm and tight. As in love as I am with the egg quality, I am even more in awe of the way they perfectly cook eggs.
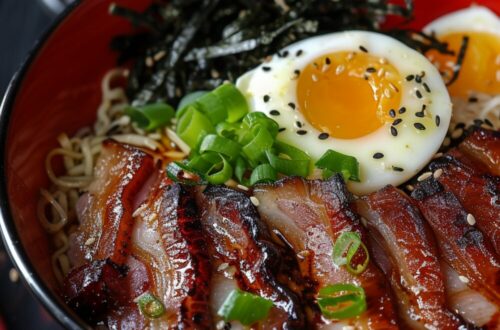
This breakfast ramen doesn’t come with unlimited eggs, but it’s still a dream come true. It’s got chewy noodles tossed with a punchy, savory soy dressing, crispy soft sous-vide pork belly, and a tender slow-poached egg. A bunch of extra umami-filled friends gather on top – seaweed, green onions, katsuobushi, sesame seeds – ready to be mixed into the party. Carbs, meat, eggs: it’s everything you want in a brunch bowl.
Bacon and Egg Breakfast Ramen Recipe
Serves: 1, scales infinitely
Prep Time: 10 minutes + pork belly cook time
Cook Time: 5-10 minutes
Total Time: 25 minutesIngredients:
Chili Oil:
- 1 tablespoon oil
- 2 cloves garlic, minced
- 1 tablespoon chili flakes
Soy Dressing:
- 2 cloves garlic, minced
- 1 tablespoon soy sauce
- 1 tablespoon mirin
- 1 tablespoon rice vinegar
- 1 tablespoon sesame oil
- 1 teaspoon sugar
- 1/2 teaspoon dashi granules
Noodles:
- 1 portion thick ramen noodles
- 3 slices pork belly (or crispy bacon)
- 1 slow poached egg
Garnish:
- Seaweed strips
- Sliced green onions
- Katsuobushi
- Toasted black sesame seeds

Instructions:
- Make Chili Oil:
Heat up 1 tablespoon of oil in a small pan over medium-low heat. Add the garlic and chili flakes and cook, stirring, until the mixture heats up and sizzles, about 1-2 minutes. Remove from the pan and set aside to cool. - Prepare Soy Dressing:
Mix together the soy dressing ingredients in a small bowl. Set aside. - Cook Noodles:
Cook the noodles according to the package and drain well. Toss with the soy dressing, to taste. Place the noodles in a shallow bowl and top with pork belly and a poached egg. - Garnish and Serve:
Garnish with seaweed strips, green onions, katsuobushi, and toasted black sesame seeds. Serve with a generous amount of chili oil. Mix and enjoy!

Helpful Hints:
- A lot of this can be made beforehand and held in the fridge. Make the chili oil and dressing the day before and hold in the fridge. The soft poached eggs can also be made the day before and heated up in a bowl of piping hot tap water while you’re cooking the noodles. The pork belly can be prepared the day before as well – sous vide it the day before, hold it in the fridge overnight, then slice it and sear it just before serving.
- If you haven’t heard of dashi granules/powder, it’s basically instant soup stock. You can find it in Asian grocery stores in the Japanese section. Katsuobushi is dried smoked bonito flakes – they add a punch of umami. You usually see it on okonomiyaki, takoyaki, and yakiudon. It’s not totally necessary in the recipe, but it is a nice bonus.
-
Chilaquiles: Tortillas and Cheese and Salsa for Breakfast
Looking for the ultimate breakfast that will fill your belly and warm your heart? Say hello to chilaquiles! This dish is a fiesta on a plate, perfect for breakfast, brunch, or any time you need a comforting meal. Imagine crispy, slightly tender tortilla chips bathed in savory salsa, topped with sunny side up eggs, and garnished with all the toppings your heart desires. If you haven’t tried chilaquiles yet, you’re in for a treat. Let’s dive into the deliciousness of chilaquiles and make your taste buds dance with joy!
What are chilaquiles?
Chilaquiles are like the breakfast superheroes of Mexico. Born out of the need to use up leftover tortillas, these magical creations involve cutting tortillas into quarters, frying them to crispy perfection, and then tossing them in warm salsa. The result? A dish that’s crispy, saucy, and utterly satisfying. Whether you prefer your chilaquiles topped with diced onions, cilantro, cream, queso fresco, or avocado, this dish has something for everyone. Plus, it’s the perfect way to start your day with a burst of flavor.
How to make chilaquiles
Chilaquiles can be as simple or as elaborate as you like. For the ultimate experience, we recommend making your own tortilla chips and salsa. Trust us, it’s worth the effort!
Ingredients:
- Tortillas/tortilla chips – old corn tortillas fry up into the best chips.
- Salsa – either homemade or store-bought, red or green.
- Toppings – fried eggs, cilantro, onions, jalapeños, sliced radishes, carnitas, tinga, avocado, crema, cheese, etc.

Instructions:
- Fry the tortillas: Cut up old tortillas into wedges and fry them in oil until they become crispy chips. Alternatively, use store-bought tortilla chips for convenience.
- Make the sauce: Simmer together blended tomatoes, onion, garlic, chipotle in adobo, and Mexican oregano until thick and aromatic.
- Sauce the tortillas: Add the chips to the sauce, stirring to coat every chip.
- Top the tortillas: Plate the chips and top with cilantro, onions, and fried eggs.
- Enjoy! Dig in and enjoy a bite of crispy tortilla, savory salsa, and creamy egg in every mouthful!

Helpful Hints:
- Use stale tortillas for frying to get the best texture.
- Customize your toppings based on what you have at home.
- Enjoy immediately for the best combination of textures.
-
Breakfast EBM: Eggs, Bacon, Mac & Cheese Symphony
Crispy bacon, cheesy mac, and softie eggs: the best breakfast combo ever? How’s 2024 going so far? We’ve been wandering around Tokyo, soaking up the relentless sunshine (except for the last two days of rain). The weather forecast here is freakishly accurate – if they predict rain at 2 pm, you better believe you’ll need an umbrella right on the dot.
Rainy days have kept us indoors, checking out new year’s sales. Found a cute noragi jacket for $30, and it’s perfect for the cold. Cold weather makes me hungry, and let’s just say I’ve been getting a bit squishy. It’s hard to resist all the good food here!
Every time we pass by a Doutor (like Starbucks but with more food), I see a giant photo of a cheesy tuna melt that looks irresistible. I haven’t given in yet, but who knows? Maybe we are the kind of people who go to Japan to eat tuna melts!?
Back to breakfast: I present you with EBM! It’s like EDM, but for breakfast lovers – extra cheesy mac and cheese, bacon bits, and soft-baked eggs. It creeps up on you like a good EDM track: the deep beat of the mac, the bass of the bacon, and the drop – the eggs on top. Breakfast and mac and cheese lovers, unite!
Ingredients:
- 4-6 slices thick cut bacon, chopped
- 2 cups dry macaroni or small pasta of choice (I used scoobi doo/cavatappi)
- 3 tablespoons butter
- 1/4 cup flour
- 2 1/2 cups milk
- 1/2 teaspoon salt
- 1/2 teaspoon pepper
- 2 cups grated cheese of choice (I used a mix of mozza and cheddar)
- Extra cheese for baking, if desired
- 4 large eggs

Helpful Hints:
- Use a mix of mozzarella and cheddar for the best cheesy flavor.
- Ensure your bacon is crispy for an added crunch.
- Make small wells in the mac & cheese for the egg whites to ensure they cook properly.

Instructions:
- Preheat the oven to 400°F.
- Fry the bacon until crispy, then set aside.
- Boil your pasta until al dente, according to the package instructions. Drain and set aside.
- In the same pot or a large sauté pan, melt the butter over medium heat. Add the flour and stir constantly for about three minutes, until smooth and incorporated.
- Pour in 1 cup of milk in a thin stream while whisking. It might start out lumpy, but keep whisking until smooth. Add the rest of the milk and whisk until smooth. Cook on medium heat, stirring occasionally, for about 10 minutes, until the sauce thickens.
- Remove from heat and add the salt, pepper, and cheese. Stir until the cheese is melted. Add the drained pasta and bacon and gently mix. Taste and adjust seasonings if needed. Place the mac and cheese in an oven-proof skillet.
- Make four small wells in the mac. Separate the egg whites from the yolks and pour the whites into the wells. Sprinkle cheese around the wells, if desired. Bake until the whites are almost set, about 10 minutes.
- Top the whites with the yolks and bake until the yolks are just starting to set, 2-3 minutes. Remove from the oven and enjoy!
-
Ultimate Huevos Rancheros Breakfast
Huevos rancheros might be the most ultimate breakfast out there. Fried eggs, warm crispy tortillas, refried beans, and salsa come together in a beautiful medley of flavors and textures. So satisfying and truly the best way to start the day.
Like most beloved breakfasts, there are many, many ways to make huevos rancheros and every family has their own way. That being said, all huevos rancheros plates include sunny side up eggs, salsa, and tortillas. This iteration is our ultimate huevos rancheros, and it’s absolutely one of my all-time favorite breakfasts. Making huevos rancheros from scratch is one of the most satisfying breakfasts you can make, and it’s so easy, whether you use fresh made or store-bought salsa.
What are Huevos Rancheros?
Huevos rancheros is a Mexican breakfast that consists of lightly fried tortillas, refried beans, sunny side up eggs, and salsa. It can be spicy or mild and dressed up with cheese, avocados, cilantro, and all the extra toppings. Huevos rancheros means “ranch style eggs” and essentially, it’s a super hearty breakfast that ranch/farm hands ate to keep up their strength throughout the day.
Ingredients:
- Salsa: Your favorite store-bought or homemade salsa, or make a simple homemade ranchero salsa with canned fire-roasted tomatoes, onion, and roasted green chile simmered in chicken broth.
- Beans: Refried beans, either homemade, leftover, or store-bought.
- Tortillas: Small corn tortillas lightly fried into tostadas, or use flour tortillas if preferred.
- Eggs: Sunny side up eggs with crispy edges and creamy yolks.
- Toppings and Sides:
- Avocados (sliced or guacamole)
- Cheese (Queso Fresco)
- Mexican rice
- Pico de gallo
- Sliced jalapeños
- Cilantro
- Carnitas, Barbacoa, or Birria (optional)

How to Make Huevos Rancheros
- Make the Salsa: In a saucepan, lightly fry chopped onions and add fire-roasted tomatoes, chopped chiles, broth, cumin, and oregano. Simmer until slightly thick and aromatic.
- Fry the Tortillas: Lightly crisp up the tortillas in hot oil until golden and crunchy on the edges.
- Fry the Eggs: Fry the eggs sunny side up with firm whites and creamy yolks.
- Assemble: Lay out the crisp tortillas and top them with some warm salsa. Add a fried egg and top with even more salsa. Finish with a bit of queso fresco and cilantro and add a side of refried beans.
- Enjoy: Dig in, making sure to get a bite of everything: crispy tortilla, savory salsa, and creamy egg!

Helpful Hints:
- Salsa: You can use your favorite salsa, either store-bought or homemade. Cooking store-bought salsa on the stove with added cumin and oregano can deepen the flavors.
- Beans: Refried beans add creaminess to the dish but are optional.
- Tortillas: Frying your own tortillas at home lets you control the texture.
- Eggs: Sunny side up eggs are classic, but cook them to your preference.
- Toppings: Customize with your favorite toppings and sides for added flavor and texture.
-
Full English Breakfast: A Hearty Start to Your Day
Bacon, sausages, eggs, tomatoes, mushrooms, toast, and beans all on one plate: is a Full English breakfast the most ultimate breakfast ever?
Confession: I’ve never had a real full English, at least not in England or anywhere in the world in fact, except right here, at home. But a couple of weeks ago, I was chatting with a friend from England, and the thing he missed the most was breakfast, specifically a Full English breakfast. He described the deliciousness for a good five minutes, but I wasn’t sold until I saw a photo. It was a giant plate and it looked AMAZING. I mean, it might have been because I was very hungry, but at the time, nothing looked better to my eyes. Thus started the Full English obsession.
What is a Full English Breakfast?
Sometimes called a fry up, a Full English is a hearty, hefty breakfast plate served in the UK and Ireland. Full English breakfasts are so popular that they’re pretty much offered throughout the day as all-day breakfast. A classic Full English breakfast contains sausages, back bacon, eggs, tomatoes, mushrooms, fried bread, and beans.
Ingredients:
- 4 links sausages (breakfast sausage preferred)
- 4 slices back bacon or Irish bacon
- 4 slices black pudding (optional)
- 1 cup mushrooms, halved or sliced
- 2 small tomatoes, halved
- 4 slices bread
- 4 eggs
- 1 can beans (Heinz preferred)

How to Make a Full English Breakfast
- Warm the Beans: Open the can of beans and warm in a small pot over low heat, stirring occasionally.
- Cook the Sausages and Bacon: While the beans are warming, cook the sausages over medium to medium-low heat until browned and cooked through, turning as needed. Push the sausages to one side and add the bacon, frying and flipping as needed.
- Cook the Black Pudding: If you’re having black pudding, add it to the pan and fry, flipping once. Keep everything warm in the pan over a low flame.
- Cook the Mushrooms and Tomatoes: In another pan, sear the mushrooms until brown and caramelized. Move to one side. Add the tomatoes, cut side down, and sear.
- Fry the Bread and Eggs: Move the meats from the pan and fry the bread in the drippings until golden and crisp. Cook the eggs in the pan that the mushrooms and tomatoes were in.
- Plate and Enjoy: Scoop the beans in the middle of the plate, then add the bacon at 1-2 o’clock, the sausages at 3 o’clock, then the eggs at 6. If you have black pudding, place it at 8 o’clock and fill the rest of the plate with the tomatoes at 11 o’clock and the mushrooms at 12. Fried bread can be tucked in wherever or placed on a side plate. Enjoy!

Helpful Hints:
- Sausages: Choose good sausages, preferably from your local butcher.
- Black Pudding: Not an absolute necessity but commonly included.
- English Bacon: Use back bacon made from pork loin with a bit of belly.
- Eggs: Typically served sunny side up but can be cooked to your preference.
- Tomatoes and Mushrooms: Use classic field tomatoes and simple brown mushrooms.
- Fried Bread: Thick-cut bread fried in a pan with oil or drippings, not toasted.
-
Breakfast Bing Bread with Bacon and Eggs
Bing bread like you’ve never seen it before: your favorite Chinese scallion pancake stuffed with bacon, served up with eggs! Bing bread is the new bao. Just take a look at the latest trends – there’s nary a bao to be found. Baos are old news, bring in the bing!
I will forever and ever love the fluffy softness of bao, but I’m never one to turn down a fluffy, crispy, bing bread. I love scallion pancakes, or cong you bing, or whatever you might call them. What’s not to love about multiple layers of crispy, flaky dough. Especially when it’s stuffed with bacon. With a random package of bacon in the fridge, bing bread seemed like the perfect idea.
This is a really easy recipe to make and if you’re thinking of having a lazy Sunday brunch, just make them the day before, freeze them (with parchment in between), then fry them up when you want to eat them. If you haven’t had Chinese bing before, they’re essentially a flaky, multilayered, laminated pancake. Just like a laminated dough, fat is put in between layers to help puff up the space between.
Bing are made with hot water dough, which helps with flakiness. It also happens to be easier to roll out because hot water doughs don’t have as much gluten– the hot water denatures the proteins so the dough making the dough less stretchy so you can roll it out thinner. Thin equals lots and lots of layers, which is a good thing.
Basically, all you really need to know about this is: bacon + crispy layers + eggs + ketchup = deliciousness. Done. Hope you guys have an awesome weekend!
Ingredients:
- 4 slices bacon, chopped
- 2 1/2 cups all-purpose flour
- 3/4 cups boiling water
- 1/4 cup cold water
- 1 1/2 teaspoons salt
- 3 tablespoons bacon fat
- Freshly ground black pepper, to taste
- Chives, if desired
- Oil for the pan
- Fried eggs, to serve
- Sour cream, to serve
- Ketchup, to serve
How to Make It:
- Fry the bacon until crispy. Remove and drain on paper towels. Save the bacon fat.
- Whisk together the flour and salt. Stir in the hot water, using a wooden spoon, and then, when the dough is cool enough to handle, add the cold water and knead until smooth. Transfer to a clean bowl, cover, and let rest for 1 hour.
- Divide the dough into 4 equal portions. Keep the other portions of dough covered while you use a rolling pin to roll out the dough, as thin as possible. Brush or use an offset spatula to spread on an even layer of bacon fat, leaving an inch border at the “top” of your piece of dough. This is to help you seal the pancake together; if you brush the fat all the way to the edges, it will be harder to seal.
- Evenly sprinkle on bacon, chives, and pepper, then roll up the dough like you would if you were making cinnamon buns, kind of like a jelly roll/tube. Then, form a coil and pinch the end so it sticks to itself and the pancake is round. Flatten the coil with the palm of your hand and proceed to use your rolling pin to roll the coil into a flat pancake. Don’t worry about any pieces of bacon that start popping out. Roll it out so the pancake is about 4-6 inches. Repeat with the remaining dough.
- To fry, heat up a bit of oil in a large frying pan over medium to medium-high heat. When hot and shimmery, swirl the oil around and then add the pancake and cook until the bottom of the pancake turns golden brown and crispy and the top starts puffing up gently. Flip and cook the other side until brown and crispy and the pancake is cooked all the way through.
- Serve with sour cream, fried eggs, and ketchup!

Helpful Hints:
- Use a non-stick pan to ensure your pancakes don’t stick.
- If you prefer a spicier kick, add a pinch of chili flakes to the bacon filling.
- Freeze any extra pancakes with parchment paper between them for easy reheating.

