-
Perfect Gravy – Step-by-Step Guide
Enhance your sauce preparation skills with our guide on gravy making techniques. Learn how to make delicious gravy from meat juices using simple steps. Our step-by-step instructions ensure you get the most out of your meat juices, making your gravy rich and flavorful every time.
How to Make Gravy
Equipment Needed:
- Flameproof roasting tray (preferably the same one you cooked your meat in)
- Jug
- Spoon
- Medium-sized bowl
- Tablespoon
- Measuring jug
- Wooden spoon
- Serving jug
Step-by-Step Instructions for Gravy Making Techniques:
- Prepare the Roasting Juices: Rest your roasted meat while you make the gravy. Carefully pour the roasting juices from the meat pan into a jug and leave to stand for 1 minute. The fat will rise to the surface, leaving the darker, more flavorful juices at the bottom.
- Skim the Fat: Spoon out the fat into a bowl. Skimming the fat produces a clearer liquid and allows the full flavor of the meat juices to come through without a fatty or bitter aftertaste.
- Make the Roux: Put the same roasting pan that the meat was cooked in on the hob over medium heat. Add 1 tablespoon of the meat fat that you skimmed off the top back into the pan. Stir in 1 tablespoon of plain flour until all combined and slightly browned, which should take around 2 minutes. This is your roux, which thickens the gravy and should be the consistency of a smooth paste.
- Add Meat Juices: Add the skimmed meat juices, stirring with a wooden spoon to ensure a smooth consistency and to scrape off any caramelized meat or vegetables stuck to the bottom of the roasting pan, as these add great flavor and depth.
- Add Stock: Gradually pour in 1 pint of good quality meat stock, stirring as you go. Bring to the boil, then simmer for 10 minutes, stirring regularly with a wooden spoon to prevent lumps.
- Season and Serve: Season with salt and pepper and serve piping hot.
Making gravy from meat juices is a simple yet essential method that results in a delicious sauce. Therefore, knowing how to make gravy properly is crucial to achieving the perfect texture and flavor. With these gravy making techniques, you can easily prepare rich and flavorful gravy for any roast meat.
Helpful Hint:
- For extra depth of flavor, add a splash of red wine or Worcestershire sauce to the gravy while it simmers.
Alternative Uses for Gravy:
- Gravy for Potatoes: Use the gravy to pour over mashed or roasted potatoes.
- Gravy for Pies: Add the gravy to meat pies for extra moisture and flavor.
- Gravy for Stews: Incorporate the gravy into stews for a richer taste.
-
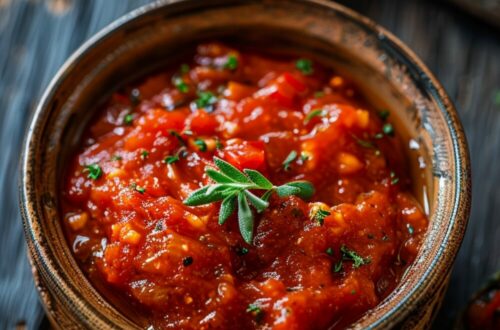
Perfect Curry Base – Step-by-Step Guide
Enhance your curry preparation skills with our guide on making a versatile curry base. Learn how to make a curry base perfectly using simple steps. Our step-by-step instructions, inspired by Sumayya Usmani, ensure you get the most out of your ingredients, making your curry base flavorful and ready for any addition.
How to Make a Curry Base
Equipment Needed:
- Saucepan
- Spatula
Step-by-Step Instructions for Curry Base Cooking Techniques:
- Heat the Oil and Ghee: To make the curry base, heat oil and ghee in a saucepan with a lid, until hot.
- Add Seeds: Add cumin, nigella, and coriander seeds and allow to splutter. Other seeds such as fenugreek and mustard seeds also work well.
- Add Ginger and Garlic: Turn the heat to low and add fresh grated ginger and garlic. Stir, ensuring they don’t burn or stick to the bottom of the pan.
- Add Tomatoes and Spices: Add chopped fresh tomatoes, tomato purée, turmeric, chili powder, salt to taste, and methi. Stir-fry for 6–8 minutes, or until the oil rises to the top and the tomatoes are soft.
- Add Main Ingredients: Add the parboiled potatoes, vegetables, paneer, or pieces of meat and cold water. Stir and increase the heat to medium. Cover the pan with the lid and cook for 10–12 minutes, or until the vegetables or meat are cooked and the liquid has evaporated (you might need to top up the water). You want a thick sauce.
- Serve: Serve sprinkled with dill, chili, and a squeeze of lemon juice.
Making a curry base is a versatile and essential method that results in a delicious sauce. Therefore, knowing how to make a curry base properly is crucial to achieving the perfect texture and flavor. With these curry base cooking techniques, you can easily prepare a flavorful base for any curry dish.
Helpful Hint:
- You can store the curry base in the refrigerator for up to three days or freeze it for later use.
Alternative Uses for Curry Base:
- Curry Soup: Use the curry base as a foundation for a hearty soup with added broth and vegetables.
- Curry Dip: Thicken the curry base and use it as a dip for breads or appetizers.
- Curry Marinade: Use the curry base as a marinade for meats before grilling or roasting.
-
Mastering Rice Cooking – Simple Methods
Enhance your side dish preparation skills with our guide on rice cooking techniques. Learn how to cook rice perfectly using simple steps. Our step-by-step instructions ensure you get the most out of your rice, making it fluffy and delicious every time.
How to Cook Perfect Rice
Equipment Needed:
- Mug (for measuring)
- Sieve
- Saucepan
- Wooden spoon
Step-by-Step Instructions for Rice Cooking Techniques:
- Measure the Rice: Use a mug to reliably measure the right amount of water for cooking your rice. For fluffy rice, put one cup of white rice into a sieve and rinse with cold water until the water begins to run clear. (If you are making stickier rice, you can skip this step.)
- Add Water: Put the rice into a saucepan with two cups of cold water.
- Bring to a Boil: Bring the water to the boil and cook for the time stated on the packet, or until softened and most of the water has been absorbed by the rice. Different types of rice will need different cooking times. Easy-cook rice will be much quicker than normal rice, for example.
- Adjust for Brown Rice: If you are cooking brown rice, you may need half a cup more water. You can add this at a later stage if your rice is looking too dry before it is fully cooked.
Cooking rice perfectly is a simple yet essential skill. Therefore, knowing how to cook rice properly is crucial to achieving the perfect texture and flavor. With these rice cooking techniques, you can easily prepare perfectly cooked rice for any meal.
Helpful Hint:
- Let the rice rest for a few minutes with the lid on after cooking to allow it to finish steaming and become even fluffier.
Alternative Uses for Cooked Rice:
- Fried Rice: Use cooked rice in a stir-fry with vegetables and protein.
- Rice Pudding: Combine cooked rice with milk, sugar, and spices for a delicious dessert.
- Rice Salad: Add cooked rice to a fresh salad with mixed greens and a light dressing.
-
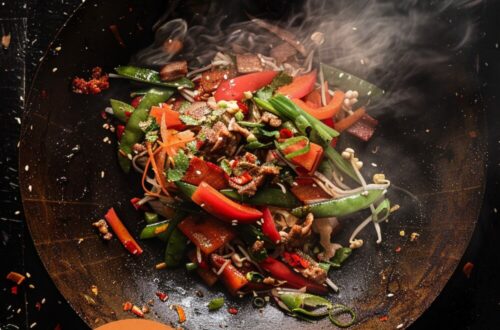
How to Make a Stir-Fry
Enhance your cooking skills with our guide on stir-fry techniques. Learn how to make a stir-fry perfectly using simple steps. Our step-by-step instructions ensure you get the most out of your ingredients, making your stir-fry delicious and perfectly cooked every time.
Equipment Needed:
- Sharp knife
- Chopping board
- Wok
- Tongs or wooden spoon
Step-by-Step Instructions for Stir-Fry Cooking Techniques:
- Prepare the Meat: Chop your choice of meat, such as chicken, turkey, or beef, into bite-sized pieces.
- Prepare the Flavorings: Finely chop your choice of flavorings such as onions, garlic, ginger, or chili.
- Prepare the Vegetables: Thickly slice your choice of vegetables, such as carrots, peppers, courgette, or mangetout.
- Brown the Meat: Heat a little oil in a wok and brown the meat until golden on all sides. Remove from the wok and set aside.
- Cook the Flavorings: Heat a little more oil in the wok and add the flavorings. Stir-fry for a few minutes.
- Cook the Vegetables: Add the vegetables and stir-fry for a few minutes.
- Combine Ingredients: Add cooked noodles or rice and return the meat to the pan. Stir-fry until everything is hot and the meat has cooked through.
- Add Sauce: Add your favorite sauce such as soy sauce, chili sauce, or hoisin sauce. Stir thoroughly and serve!
Making a stir-fry is easy and versatile. Therefore, knowing how to make a stir-fry properly is essential to achieve the perfect texture and flavor. With these stir-fry cooking techniques, you can easily prepare a delicious stir-fry for any meal.
Helpful Hint:
- For extra flavor, marinate the meat in your favorite sauce for at least 30 minutes before cooking.
Alternative Uses for Stir-Fry Ingredients:
- Stir-Fry Wraps: Use the stir-fry mixture in a wrap with lettuce and a drizzle of sauce.
- Stir-Fry Salad: Add the stir-fry mixture to a bed of fresh greens for a hearty salad.
- Stir-Fry Soup: Add the stir-fry mixture to a broth for a quick and flavorful soup.
-
Perfectly Cooked Pasta – Step-by-Step Guide
Enhance your pasta cooking skills with our guide on cooking pasta perfectly. Italian-born food writer Anna Del Conte shares her secrets to achieving perfectly cooked pasta every time. Learn how to cook pasta using simple steps that ensure it is perfectly al dente and full of flavor.
Equipment Needed:
- Large pot
- Wooden spoon
- Colander
Step-by-Step Instructions for Pasta Cooking Techniques:
- Use Plenty of Water: Fill a large pot with plenty of water. Using a large amount of water helps prevent the pasta from sticking together.
- Add Plenty of Salt: Bring the water to a rolling boil and add a generous amount of salt. The water should be as salty as the sea, which enhances the flavor of the pasta.
- Bring to a Boil: Ensure the water is at a rolling boil before adding the pasta. The high heat helps cook the pasta evenly.
- Add the Pasta: Add your pasta to the boiling water. Stir immediately with a wooden spoon to prevent sticking.
- Cook Until Al Dente: Cook the pasta according to the package instructions until it is al dente, meaning it should be firm to the bite. Taste a piece a minute or two before the recommended cooking time to ensure it is not overcooked.
- Do Not Overdrain: When the pasta is cooked, drain it in a colander but do not overdrain. Leaving a little bit of the cooking water helps keep the pasta moist and prevents it from becoming too dry.
Cooking pasta perfectly is a simple yet essential skill. Therefore, knowing how to cook pasta properly is crucial to achieving the perfect texture and flavor. With these pasta cooking techniques from Anna Del Conte, you can easily prepare perfectly cooked pasta for any meal.
Helpful Hint:
- Save a cup of the pasta cooking water before draining. It can be used to adjust the consistency of your pasta sauce.
Alternative Uses for Cooked Pasta:
- Pasta Salad: Use cooked pasta in a salad with mixed vegetables and a light dressing.
- Baked Pasta: Combine cooked pasta with your favorite sauce and cheese, then bake until golden and bubbly.
- Pasta Soup: Add cooked pasta to a hearty soup for added texture and flavor.
-
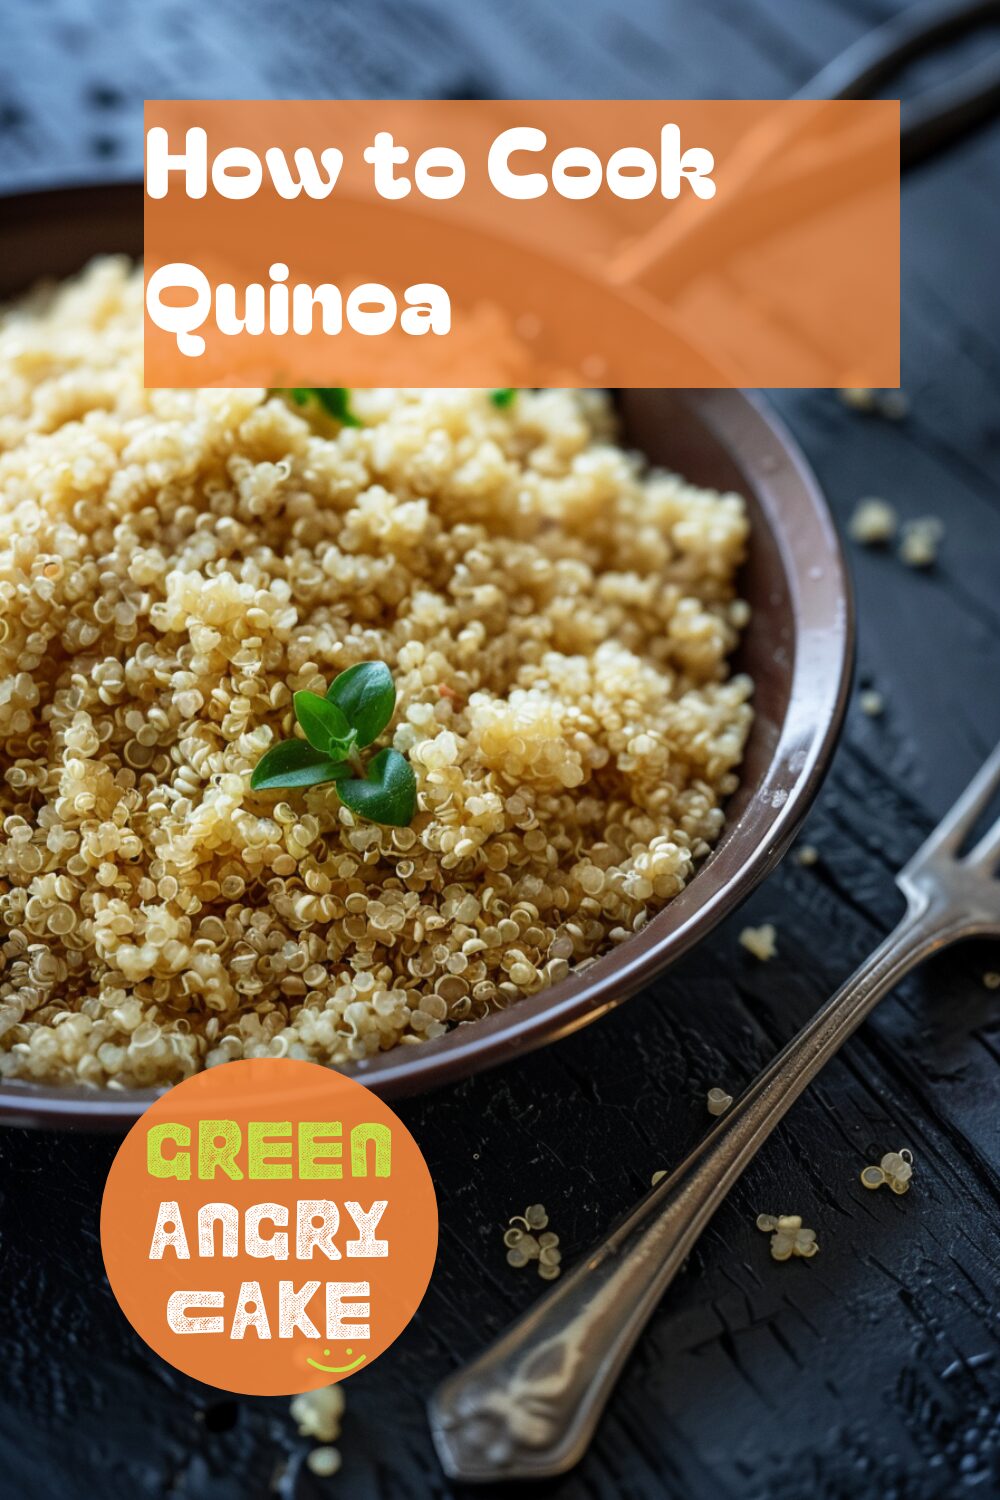
Quinoa Cooking Techniques – How to Cook Quinoa
Enhance your side dish preparation skills with our guide on quinoa cooking techniques. Learn how to cook quinoa perfectly using simple steps. Our step-by-step instructions ensure you get the most out of your quinoa, making it fluffy and delicious every time.
How to Cook Quinoa
Equipment Needed:
- Sieve
- Pan
- Wooden spoon
- Fork
Step-by-Step Instructions for Quinoa Cooking Techniques:
- Rinse the Quinoa: For two servings, use 100g quinoa. Rinse quinoa in a sieve under cold running water. This helps to remove some of the bitterness and stops it from sticking together.
- Add Water and Salt: Tip the quinoa into a pan and add three times the amount of water (300ml) along with a pinch of salt. Stir once with a wooden spoon to stop the quinoa from sticking together.
- Bring to a Boil: Place the pan over medium heat and bring to the boil. Once boiling, give it another stir.
- Simmer: Reduce the heat and simmer for 15-18 minutes, or until the liquid is absorbed and the quinoa grains become softer and a little translucent around the edges.
- Fluff and Serve: Once the water is absorbed, remove from the heat, fluff up with a fork and serve hot or leave to cool to enjoy later.
Cooking quinoa is a quick and versatile method that results in a nutritious side dish. Therefore, knowing how to cook quinoa properly is essential to achieve the perfect texture and flavor. With these quinoa cooking techniques, you can easily prepare fluffy and delicious quinoa for any meal.
Helpful Hint:
- For extra flavor, cook the quinoa in vegetable or chicken broth instead of water.
Alternative Uses for Cooked Quinoa:
- Quinoa Salad: Use cooked quinoa in a salad with mixed greens, tomatoes, and cucumbers.
- Stuffed Peppers: Fill bell peppers with cooked quinoa mixed with vegetables and bake.
- Quinoa Breakfast Bowl: Mix cooked quinoa with yogurt, fruits, and nuts for a nutritious breakfast.
-
Perfectly Cooked Couscous – Simple Cooking Methods
Enhance your side dish preparation skills with our guide on couscous cooking techniques. Learn how to cook couscous perfectly using simple steps. Our step-by-step instructions ensure you get the most out of your couscous, making it fluffy and flavorful every time.
How to Cook Couscous
Equipment Needed:
- Heatproof bowl
- Kettle
- Clingfilm
- Fork
Step-by-Step Instructions for Couscous Cooking Techniques:
- Prepare the Couscous: Pour your couscous into a heatproof bowl. For added flavor, crumble a stock cube over the couscous if desired.
- Boil the Water: Bring a kettle of water to the boil and pour it over the couscous to cover by roughly 1cm/½in.
- Add Seasoning: Pour in a glug of good quality olive oil and squeeze half a cut lemon over the couscous. Season with salt and pepper if not using a stock cube.
- Mix Flavors: Stir to mix the flavors through the couscous.
- Cover and Set Aside: Cover the bowl tightly with clingfilm and set aside for 10 minutes.
- Prepare Additional Ingredients: Meanwhile, chop up herbs and vegetables such as chives and red peppers to mix with the couscous.
- Fluff the Couscous: When ready, remove the clingfilm and use a fork to fluff up the grains of couscous, again spreading the flavors throughout.
- Adjust Seasoning and Add Ingredients: Taste and adjust the seasoning, then add your extra ingredients and stir to mix.
Cooking couscous is a quick and versatile method that results in a delicious side dish. Therefore, knowing how to cook couscous properly is essential to achieve the perfect texture and flavor. With these couscous cooking techniques, you can easily prepare fluffy and flavorful couscous for any meal.
Helpful Hint:
- For extra flavor, add a pinch of ground cumin or a handful of raisins to the couscous before covering it with clingfilm.
Alternative Uses for Couscous:
- Couscous Salad: Use cooked couscous in a salad with mixed greens, tomatoes, and cucumbers.
- Stuffed Peppers: Fill bell peppers with cooked couscous mixed with vegetables and bake.
- Couscous Pilaf: Cook couscous with sautéed onions, garlic, and spices for a flavorful pilaf.
-
How to Fillet Cooked Fish
Enhance your seafood preparation skills with our guide on cooked fish filleting techniques. Learn how to fillet cooked fish perfectly using simple steps. Our step-by-step instructions ensure you get the most out of your cooked fish, making it easy to enjoy this delicious seafood.
Equipment Needed:
- Knife
- Fork
Step-by-Step Instructions for Cooked Fish Filleting Techniques:
- Place the Fish: Place the fish on its side.
- Make Initial Cuts: Make a cut behind the head that goes down to the spine. Make a similar cut before the tail. (There’s no need to cut the head and tail off completely.)
- Cut Along the Spine: Make a horizontal cut into the side of the fish, following the line of the spine from head to tail. This should separate the side of the fish into two portions, top and bottom.
- Remove the Top Fillet: Use your knife to slide the top fillet up and off the bones.
- Remove the Bottom Fillet: Push the bottom fillet downwards off the bones.
- Remove the Spine: Make a cut through the spine near the tail, then lift the spine and smaller bones out all in one piece. This will let you cut away the fillets from the other side of the fish.
Filleting cooked fish is a straightforward method that results in delicious, boneless portions. Therefore, knowing how to fillet cooked fish properly is essential to enjoy this seafood to the fullest. With these cooked fish filleting techniques, you can easily prepare perfectly filleted fish for your favorite recipes.
Helpful Hint:
- Save the bones and head to make a flavorful fish stock or broth.
Alternative Uses for Filleted Cooked Fish:
- Fish Tacos: Use filleted cooked fish in soft tacos with fresh salsa and lime.
- Fish Salad: Add filleted cooked fish to a fresh salad with mixed greens and a light dressing.
- Fish Sandwiches: Make sandwiches with filleted cooked fish, lettuce, and tartar sauce.
-
Sardine Cleaning Techniques – How to Clean and Fillet Sardines
Enhance your seafood preparation skills with our guide on sardine cleaning techniques. Learn how to clean and fillet sardines perfectly using simple steps. Our step-by-step instructions ensure you get the most out of your sardines, making them ready for your favorite recipes.
How to Clean and Fillet Sardines
Equipment Needed:
- Sharp knife
- Scissors
Step-by-Step Instructions for Sardine Cleaning Techniques:
- Remove Scales: Check to see if the sardine has any large scales on the skin, especially near the head. Remove the scales by scraping with the blade of a knife in short, sharp bursts against the grain of the scales and back again.
- Cut Off Fins: Use scissors to cut off the fins from the top and bottom of the fish.
- Cut Open the Belly: Use scissors to cut the fish open along the belly from tail to head.
- Remove Guts: Turn on a tap at the sink to start a little water running very gently. Put your thumb into the cut belly near the tail and gently scrape up towards the head, pushing the guts out of the body. Discard the guts and gently rinse the fish inside and out under the tap, being careful not to break the skin.
- Butterfly the Fish:
- Place the fish on its side and using a sharp knife cut down either side of the spine at the tail end.
- Turn the fish onto its back and work your fingers along the sides of the spine, from tail to head, to separate the spine from the flesh.
- Cut off the tail and head, with spine attached. You should be left with just the meat of the fish, as a butterfly fillet.
- Trim and Separate Fillets: Trim the outer edges of the butterflied fish to remove any fin parts. If you want two fillets, cut the butterfly in half along where the spine used to be.
Cleaning and filleting sardines is a quick and essential method to prepare them for various dishes. Therefore, knowing how to clean and fillet sardines properly is essential to achieve the perfect texture and flavor. With these sardine cleaning techniques, you can easily prepare sardines for your favorite recipes.
Helpful Hint:
- Use the trimmed off parts to make a flavorful fish stock.
Alternative Uses for Sardine Fillets:
- Grilled Sardines: Use filleted sardines for grilling with your favorite marinade.
- Sardine Salad: Add filleted sardines to a fresh salad with mixed greens and a light dressing.
- Sardine Pasta: Toss filleted sardines with pasta, garlic, and olive oil for a delicious meal.
-
Perfectly Cleaned Fish – Simple Scaling and Gutting Methods
Enhance your seafood preparation skills with our guide on fish cleaning techniques. Learn how to scale, gut, and clean round fish perfectly using simple steps. Our step-by-step instructions ensure you get the most out of your fish, making them ready for your favorite recipes.
Scaling, Gutting, and Cleaning a Round Fish
Equipment Needed:
- Chopping board
- Sharp knife
- Bin liner
Step-by-Step Instructions for Fish Cleaning Techniques:
- Scale the Fish:
- Holding the fish by the tail, scrape the blade in short, sharp bursts against the grain of the scales and back again, working the knife from the tail to the head.
- Rinse the fish.
- Gut the Fish:
- Slice the length of the belly of the fish and pull the guts from it, cutting them out at the top.
- Clean the Fish:
- Run cold water over the fish and inside the belly cavity to clean thoroughly.
Scaling fish is a messy job, but it’s easy once you know how. Therefore, knowing how to scale, gut, and clean round fish properly is essential to prepare them for various dishes. With these fish cleaning techniques, you can easily prepare fish such as mackerel, sea bass, sea bream, haddock, mullet, pollack, snapper, and John Dory for your favorite recipes.
Helpful Hint:
- Use a bin liner to catch the scales and guts for easier cleanup.
Alternative Uses for Cleaned Fish:
- Grilled Fish: Use cleaned fish for grilling with your favorite marinade.
- Fish Stew: Add cleaned fish to a hearty stew with vegetables and spices.
- Baked Fish: Bake cleaned fish with herbs and lemon slices for a simple and delicious meal.

